
ELEGOO 0.96 Inch OLED Display Screen Module
4.6Editor score
Self-luminous pixels
128×64 graphics
Three included modules
This guide compares the top 10 Arduino LCD display modules including OLED, TFT, and I2C options to help makers choose the right screen for their projects.
Arduino LCD displays are essential components for any electronics enthusiast looking to add visual feedback to their projects. Whether you need simple text output or complex graphics, choosing the right module can make a significant difference in functionality and ease of use.
We evaluated ten top-rated display modules based on resolution, connectivity options, compatibility with various microcontrollers, and user reviews. Our analysis focuses on practical performance, build quality, and the value they offer to hobbyists and professionals alike in the current market.
Each selection highlights specific strengths and ideal use cases to help you find the perfect match for your needs. Please note that pricing and availability may fluctuate over time so verify current details before making your final purchase decision.
4.6Editor score

4.5Editor score

4.4Editor score
Below is a detailed side-by-side comparison of all ten selected modules to help you quickly identify which specifications best fit your specific project requirements and budget constraints.




This module offers a reliable text display solution for Arduino projects with its classic 16×2 layout. Users appreciate the straightforward I2C interface which reduces wiring complexity significantly compared to parallel connections. It is a top pick for general use cases requiring simple output.
We may earn a commission when you buy through this link, at no additional cost to you.
The built-in potentiometer allows precise adjustment of the blue backlight to suit different lighting conditions. The 5V power requirement aligns well with standard Arduino voltage levels ensuring safe operation. Compatible boards include Raspberry Pi and various microcontroller platforms.
While it lacks backlight control via software the manual adjustment provides sufficient versatility for most DIY builds. The limitation to text output means it is not ideal for graphic interfaces but perfect for status indicators. Overall it remains a solid choice for beginners and experts.
We recommend this module for anyone needing a dependable text output screen without complex setup requirements. It works seamlessly with standard Arduino libraries making implementation quick and efficient. This choice delivers great value for routine display needs in embedded systems.
The I2C protocol reduces pin usage making it simple to connect even with limited GPIO ports available on your board.
Manual backlight control ensures readable text in bright environments or dark rooms without software overhead.
We may earn a commission when you buy through this link, at no additional cost to you.
This OLED module delivers exceptional value with three units included allowing multiple projects or spares. The self-luminous pixels provide high contrast images that are easy to read in various lighting. It is an excellent budget option for visual feedback.
We may earn a commission when you buy through this link, at no additional cost to you.
The 128×64 graphics capability supports icons and simple interfaces beyond just text. Using the SSD1306 driver ensures broad software support across most Arduino development environments. The fixed yellow and blue zones help organize information clearly on the small screen.
While touch input is not supported the static display works well for dashboards and sensors. The fixed colors limit customization but aid readability in status indicators. The low power draw makes it suitable for battery-powered applications efficiently.
We suggest this kit for hobbyists needing reliable and cheap visual components. Its high rating reflects consistent performance and ease of setup. This option is ideal for those prototyping multiple units on a limited budget.
Getting three modules lets you build several projects or keep spares without buying individually later.
OLED pixels emit their own light requiring no backlight thus saving power and improving contrast.
We may earn a commission when you buy through this link, at no additional cost to you.
This touchscreen module transforms Arduino projects into interactive interfaces with its large 2.8-inch color display. The high resolution supports detailed graphics and menus making it suitable for complex control systems. It stands out for its premium feature set.
We may earn a commission when you buy through this link, at no additional cost to you.
The resistive touch input paired with a stylus allows precise navigation on the screen. An onboard SD card slot enables storing assets like images and logs for data logging projects. The shield format connects directly to UNO headers for simplified prototyping.
While the parallel interface may use more pins than I2C it supports responsive updates for real-time visuals. Users must ensure compatibility with their specific microcontroller as logic levels may vary. The included tutorial aids setup for those new to touch screens.
We recommend this module for projects requiring rich visual feedback and user input. It bridges the gap between basic output and sophisticated GUI applications. This is a top choice for advanced makers seeking robust functionality.
Touch support allows users to navigate menus and adjust settings directly on the display.
Built-in card slot supports storing media and data logs expanding project memory.
We may earn a commission when you buy through this link, at no additional cost to you.
This module simplifies connections for IoT devices by using the I2C protocol to minimize wiring needs. It is well suited for smart building and home automation projects where space is limited. The blue backlight provides clear visibility during operation.
We may earn a commission when you buy through this link, at no additional cost to you.
The potentiometer allows users to adjust both contrast and brightness manually for optimal viewing. It supports a wide range of boards including Raspberry Pi STM32 and various maker platforms. The compact dimensions fit easily into enclosures for finished products.
While it does not support graphics the text output is reliable for sensor data displays. The two-pack value adds convenience for building multiple units or keeping backups. Performance remains stable across different supply voltages as specified.
We suggest this for makers focusing on efficient wiring and broad compatibility. The simple setup reduces development time significantly. It remains a strong contender for standard text display requirements in modern projects.
I2C reduces pins required freeing up GPIO for other sensors or components easily.
Manual contrast and brightness controls ensure readability in any lighting condition.
We may earn a commission when you buy through this link, at no additional cost to you.
This module features a new type integrated conversion circuit improving stability over older parallel versions. It is ideal for beginners who need reliable performance without complex wiring setup. The two-pack allows testing different configurations or building multiple projects.
We may earn a commission when you buy through this link, at no additional cost to you.
Freenove provides example projects for mainstream controllers like Arduino and ESP32 via online links. This resource helps users get started quickly without needing to write code from scratch. The I2C interface saves ports for adding more components later.
While paper tutorials are not included the online resources are sufficient for most users. The code examples cover basic usage scenarios which may require adaptation for advanced needs. Compatibility extends to Raspberry Pi Pico and other popular boards.
We recommend this for entry-level projects requiring dependable text output. The included support ensures a smooth learning curve for new makers. It is a cost-effective solution for standard display tasks.
Integrated circuit design reduces noise and improves reliability over separate converters.
Digital tutorials and code examples help users get started without printed manuals.
We may earn a commission when you buy through this link, at no additional cost to you.
This module is recognized for its straightforward implementation with direct library support for easy coding. Users benefit from reduced pin usage through the IIC protocol which simplifies wiring significantly. It performs well for simple status displays and data readouts.
We may earn a commission when you buy through this link, at no additional cost to you.
The potentiometer allows easy adjustment of backlight and contrast for optimal visibility. Power requirements are standard at 5V making it compatible with most development boards. The clear blue display ensures text remains readable in various environments.
While it offers basic functionality it lacks advanced graphics capabilities. This trade-off ensures reliability and speed for simple text tasks. It remains a solid choice for projects prioritizing functionality over visual flair.
We suggest this for users who value simplicity and compatibility. The provided library reduces coding time. It remains a dependable option for routine text display needs in electronics projects.
Pre-written libraries allow quick integration into Arduino and Raspberry Pi projects.
Blue backlight ensures good contrast for text in most lighting situations.
We may earn a commission when you buy through this link, at no additional cost to you.
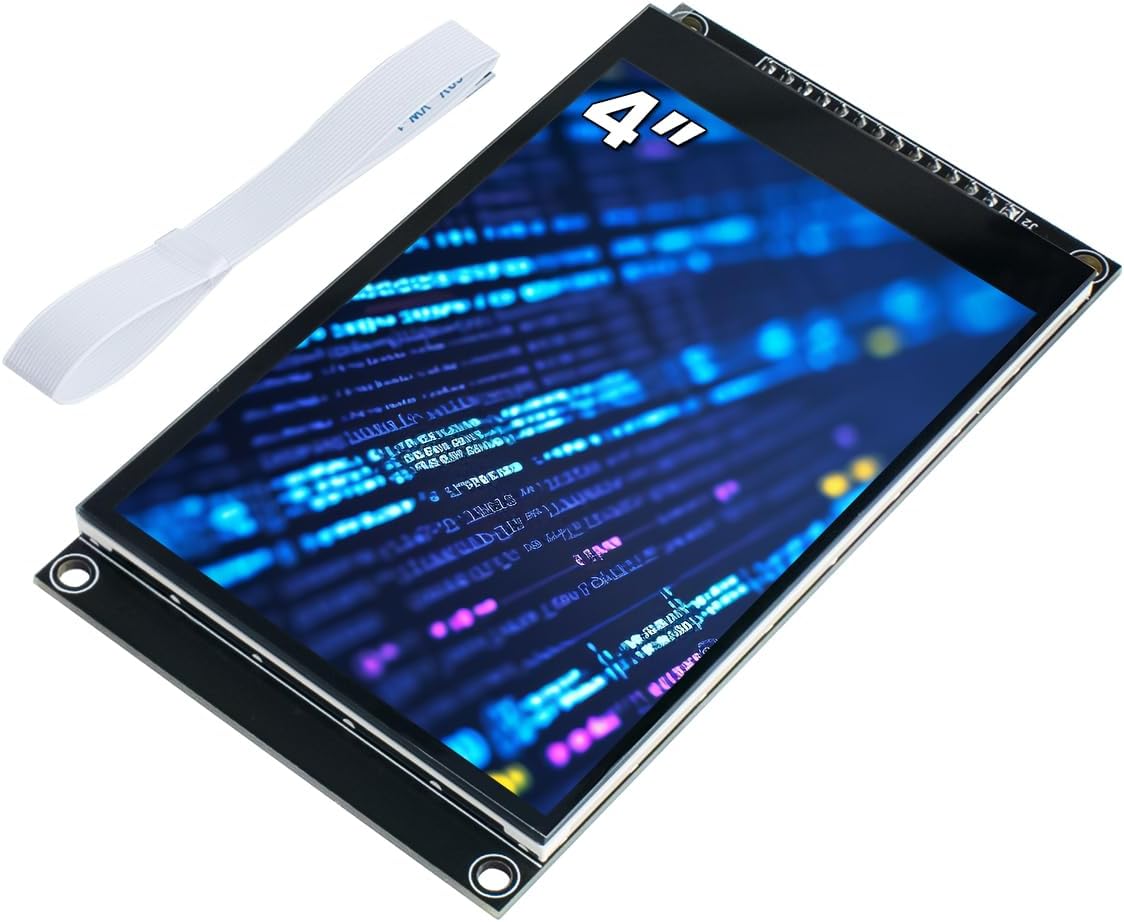
This module offers a significantly larger display area suitable for dashboards and complex interfaces. The capacitive touch panel provides a more modern experience compared to resistive alternatives. It is designed for advanced users needing rich visual output.
We may earn a commission when you buy through this link, at no additional cost to you.
The resolution supports detailed graphics and icons improving the user experience in embedded systems. An onboard TF card slot allows for storage expansion which is useful for media files. The ST7796S driver supports both 5V and 3.3V logic levels.
While the rating is lower users note the improved usability of capacitive touch. The complexity of the interface requires careful consideration of pin usage. It is best suited for projects where screen size is a priority.
We recommend this for advanced builds requiring large touch interfaces. The high resolution and capacitive touch offer superior interaction. Ensure your microcontroller can handle the bandwidth required.
Capacitive touch allows smoother interaction similar to smartphone screens.
320×480 resolution supports detailed graphics and icons.
We may earn a commission when you buy through this link, at no additional cost to you.
This package provides five OLED modules ideal for building clusters or keeping substantial spares. The self-luminous technology ensures high contrast without the need for a backlight. It delivers exceptional value for bulk needs in prototyping.
We may earn a commission when you buy through this link, at no additional cost to you.
The SSD1306 driver is widely supported making software setup straightforward. Power consumption is low which is beneficial for battery-operated projects. The wide viewing angle ensures readability from different positions in a device.
While the screen size is limited it is sufficient for status indicators and simple data. Users must generate fonts as none are embedded in the controller. The mix of blue and yellow units adds visual variety.
We suggest this for users needing multiple displays for distributed systems. The low power and ease of use are key advantages. It remains a top choice for bulk OLED requirements.
Five units allow for multiple devices or replacements without frequent purchases.
OLED pixels produce their own light improving contrast and reducing power.
We may earn a commission when you buy through this link, at no additional cost to you.
This compact display offers high resolution graphics in a small form factor. The IPS panel ensures excellent viewing angles and color reproduction for rich visual output. It is perfect for portable handheld devices where space is limited.
We may earn a commission when you buy through this link, at no additional cost to you.
The SPI interface uses minimum GPIO pins allowing more room for other sensors. The color depth supports vibrant images enhancing the user interface experience. It supports both 3.3V and 5V logic levels with proper setup.
Users must ensure power supply and logic voltage consistency to avoid damage. The driver support is robust making it suitable for various microcontrollers. The backlight ensures visibility even in dim lighting conditions.
We recommend this for portable projects needing good color quality. The compact size makes it versatile for various form factors. It is a strong option for handheld electronics.
IPS technology ensures consistent image quality from different viewing positions.
Small dimensions fit easily into handheld and portable devices.
We may earn a commission when you buy through this link, at no additional cost to you.
This module delivers high quality visual output in a very small form factor. The IPS panel ensures vibrant colors and wide viewing angles ideal for portable devices. It is highly rated for its build quality and performance.
We may earn a commission when you buy through this link, at no additional cost to you.
The 4-wire SPI interface reduces IO pin usage simplifying hardware design. Clear pin labels assist in quick setup reducing the risk of connection errors. It supports both 3.3V and 5V logic making it versatile.
While the screen size is small it provides a crisp resolution for icons and text. The integrated controller streamlines communication with Arduino and Raspberry Pi. It is a reliable choice for compact visual feedback.
We recommend this for projects prioritizing small size and quality visuals. The ease of setup and compatibility are major benefits. It is a top choice for handheld electronics and small dashboards.
The display ensures visible output even in ambient lighting conditions.
Clearly marked pins make connection straightforward for all users.
We may earn a commission when you buy through this link, at no additional cost to you.
Selecting the right display involves considering several factors to ensure it meets your project requirements and integrates smoothly with your hardware setup.
You will encounter three primary types including LCDs which use backlighting and are ideal for text, OLEDs which are self-luminous for better contrast, and TFTs which offer high resolution color graphics for complex interfaces.
Choose LCD for text, OLED for low power and contrast, or TFT for graphics needs.
Interfaces like I2C save pins by using two wires while SPI offers faster data transfer at the cost of more pins. Parallel interfaces are older and consume significant GPIO resources making them less practical for modern microcontrollers.
Use I2C for simplicity and low pin usage or SPI for faster graphics updates.
Resolution determines how much information you can show ranging from simple character grids to high pixel counts. Physical size impacts the form factor of your device so ensure it fits your enclosure or handheld design comfortably.
Pick size based on device constraints and resolution based on data complexity.
Most modules operate on 3.3V or 5V but verifying compatibility with your power supply is critical. OLEDs typically consume less power than backlit LCDs making them suitable for battery powered projects.
Check voltage specs to prevent damage and match your power source.
Interactive projects may need touch screens which come in resistive or capacitive options. Resistive screens work with any object while capacitive touch works best with conductive items like fingers offering a better user experience.
Decide if touch is needed and choose the appropriate technology accordingly.
A well supported driver chip ensures libraries exist for popular environments like Arduino IDE. Check for available examples and documentation to reduce the time spent on software implementation.
Prioritize modules with established community support and active code libraries.
Color options affect readability so consider ambient lighting conditions where the device will be used. High contrast displays are easier to read in sunlight while monochrome displays save power and complexity.
Select color or monochrome based on your lighting environment and readability needs.
Bulk packs often provide better value if you need multiple units for a project or for testing. Balance the unit price against features like resolution and interface to ensure you get the right performance level.
Look for bundles if you need multiple units to maximize cost efficiency.
Start by verifying the voltage requirements of your module and connect the appropriate power pins to your board or external supply. For I2C modules connect the data and clock pins to the corresponding SDA and SCL pins on your microcontroller.
Install the necessary driver library in your development environment and use example code to initialize the display. This ensures that the hardware is correctly configured before writing custom logic for your project.
Protect the display from static electricity and physical damage by handling it carefully and storing it in a dry place. Clean the screen with a soft cloth if it accumulates dust and avoid applying pressure to the surface.
I2C uses fewer pins making wiring simpler for basic projects while SPI allows faster data transfer which is better for graphics. Most modules use one of these two protocols to communicate with the microcontroller efficiently.
OLED displays generate their own light so they do not need a backlight. This results in better contrast ratios and lower power consumption compared to LCDs which rely on a separate light source.
It is generally safe if the module specifies compatibility with both 3.3V and 5V. However check the logic level requirements to avoid damaging the display if your microcontroller sends higher voltage signals than it supports.
This issue often stems from incorrect I2C addresses or wiring issues like loose connections. Verify your address settings in code and ensure all pins are connected securely according to the pinout diagram.
Many LCD modules include a physical potentiometer on the back for manual brightness adjustment. Software control may be available on some models via specific library functions depending on the driver support.
OLED displays are typically the best choice because they have low power consumption and do not require a backlight. This helps extend battery life significantly compared to standard LCD modules in portable applications.
We have reviewed ten top displays ranging from simple text modules to advanced touch interfaces to help you make an informed decision. Each option offers unique strengths suited for different project complexity levels and user needs.
When selecting a display prioritize interface type and resolution based on your specific application requirements. Consider power needs and physical size to ensure the module fits seamlessly into your design constraints.
Always check current prices and availability before buying as market conditions can change quickly. Investing in the right screen will greatly enhance the functionality and user experience of your electronics projects.
